
Using the webhook with the usage alert event allows you to be notified of a device using more data than you expect. It's easy to set up using a 3rd party app connection service.
Before you start
You will need to find a 3rd party app connection service to connect the Webhook event sent by Onomondo to the specific notification service you want to use. Some common examples are:
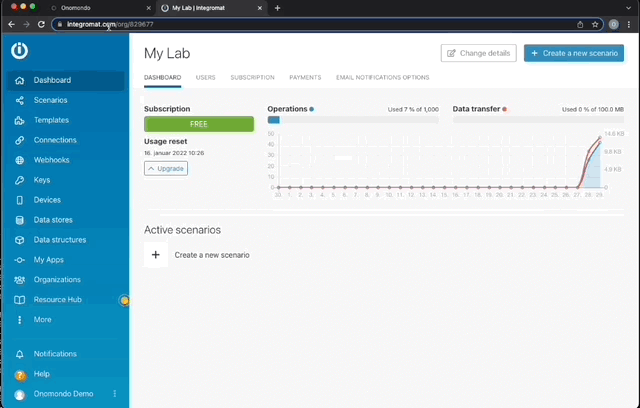
For this example, we will be using Integromat. It has a free version that includes the Webhook service and gives you more options on how to present the notification in the service of your choice.
It will also be good to understand the basics of the data limit feature.
Contents
- Setting up for test
- Setting up Integromat
- Creating a Webhook on Onomondo
- First test of Webhook on Integromat
- Setting up a notification
- Testing the notification
- Turn on your Scenario
Setting up for test
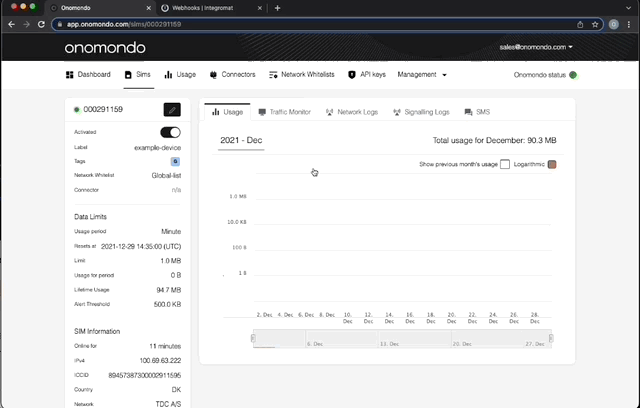
A simple way to set up the test is using a mobile phone with a speedtest service with an Onomondo SIM in it and editing the SIM's data limit on the platform:
Usage Period: Per minute
Limit (MB): 1
Alert Threshold (MB): 0.5
Minimum: There is a minimum size limit of 0.5MB for any data limit or Alert-Threshold.
Adding a tag to the SIM is also a good way to limit the webhook triggers to your test device during development. However, in production, tags are also handy for e.g. customising your setup by adding different end points/webhooks for different products/customers.
In this example, we've given the SIM a tag called "GlobalTrackerUnit".
Setting up Integromat
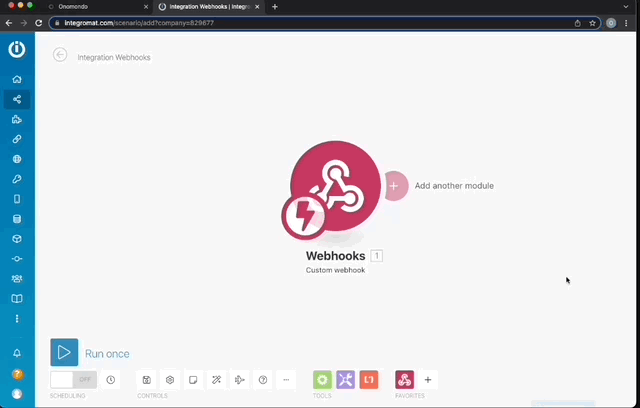
Once you have created a user for Integromat, create a new scenerio, click on the start button and select "Webhooks".
No click "Add" to creat the webhook and give it a name. In the example, we use "UsageAlerts".
Afterwards, you can copy the URL of the webhook you have created as you will need it when you create your Onomondo webhook.
Creating a webhook on Onomondo
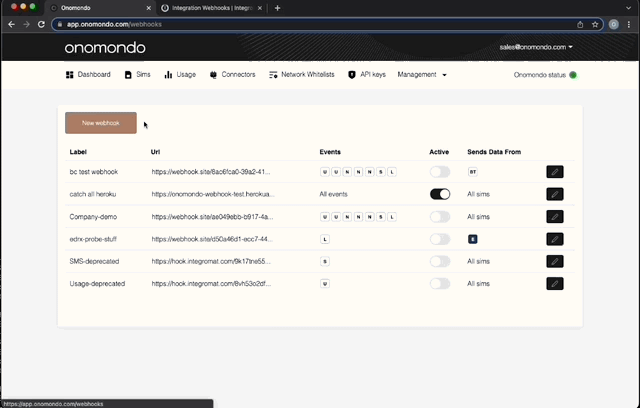
Once you have the URL of the webhook, go to the Webhooks page on the Onomondo platform and click the "New webhook" button.
Webhooks are a management feature and can only be created by Admin or Owner user types.
Give the Webhook a name and paste the URL from Integromat (or other third party app). In the example, we also restrict the Webhook only to send events related to the Tag "GlobalTrackerUnit".
This Webhook only needs to send one kind of event, so deselect all events except for "Usage Alerts" and then click the "Create Webhook" button at the bottom right of the page.
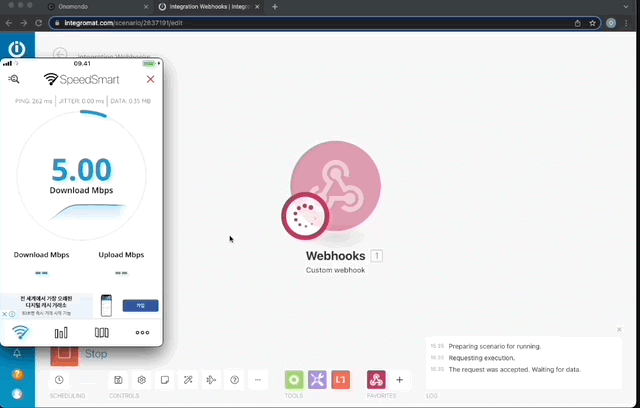
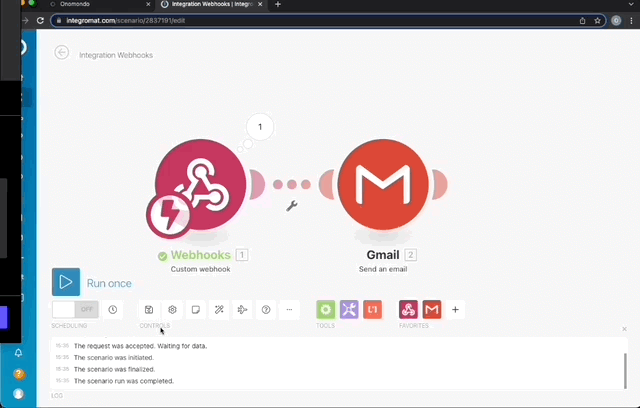
First test of Webhook on Integromat
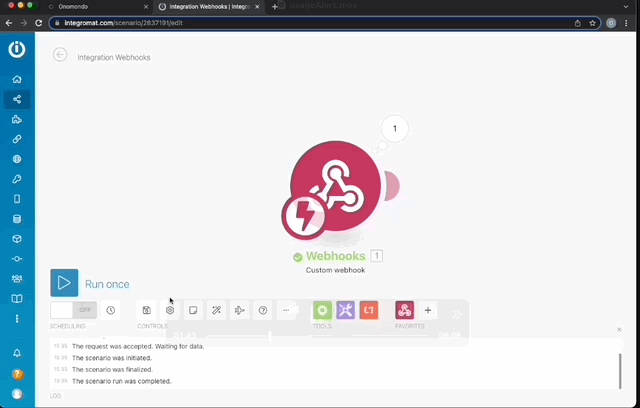
Once the Onomondo Webhook is created, go back to Integromat and click the "Run once" button.
Now use the phone to run a Speed Test. Before the Speed Test is finished, the data will cut out. Due to the size of the limit we have set, the webhook will trigger 2x. One when the Alert Threshold is reached (at 0.5MB) and a second when the data limit is exceeded.
Since the data interval is 1 minute, it will reset every minute, allowing you to run multiple tests if you choose.
You will see a bubble pop up from the Webhooks module. You can click this to get a break down of the data received by the Webhook module.
The Webhook module also uses this initial packet to identify the expected data structure it will expect in the future.
There was no response
If you did not see a response come through to Integromat, check the error log page on the Platform. This will show you the most recent errors for Onomondo Webhooks and Connectors.
Setting up a notification
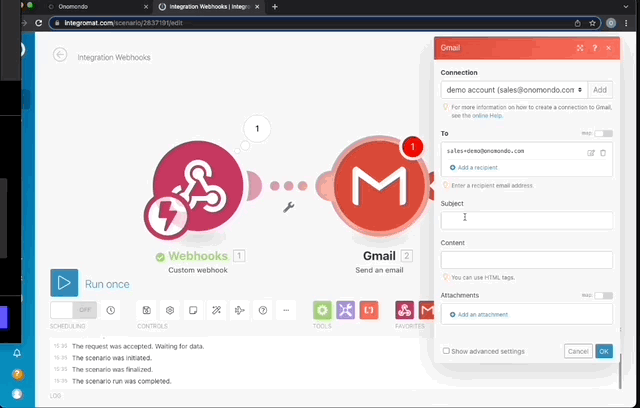
Once you have an example data packet, you can begin using it to set up a notifcation of a service of your choice. In this example, we will use the Gmail module, but you can set up notifications for other services like Slack, generic email, Microsoft Teams or a bunch of others depending on your perferences.
Once you have selected the module you want to use, you will need to connect the module with your own service. This is done in a similar way to creating the Webhook by clicking the Add button.
Once you have set the basic information (for example Slack channel you want it posted in or email recepient to receive the email), you can start to fill in the content of the notification using data from the example event. A window pops up with different options. Under the star tab you can see all the options from previous modules in the Scenario. In this case, there is only one (the Webhooks module).
There are also other tabs that give you options for logic, numbers, strings, date time and arrays.
Using the "reason" field from the webhook event
The reason changes depending on if it the SIM has reached the alert-threshold or limit. This can be used to configure the notification to display different text depending on which event is used.
Using the "total", "used" or "alert-threshold" fields from the webhook event
The values of these fields are bytes and in number format. You can manipulate these values using the string's toString feature with equation features in the number's tab. For example, convert the bytes into MB (as seen in example), calculate percentage.
Other suggestions
You can also use date time features to change the formatting of the "resets_at" or "time" fields or calculate time remaining before the data limit period sets.
In our example when using some of Integromat's data manipulation features such as toString and if , you will need to make sure you use their operators and not type them in. You will know it is correct because the symbol should be a green box (see our example below)
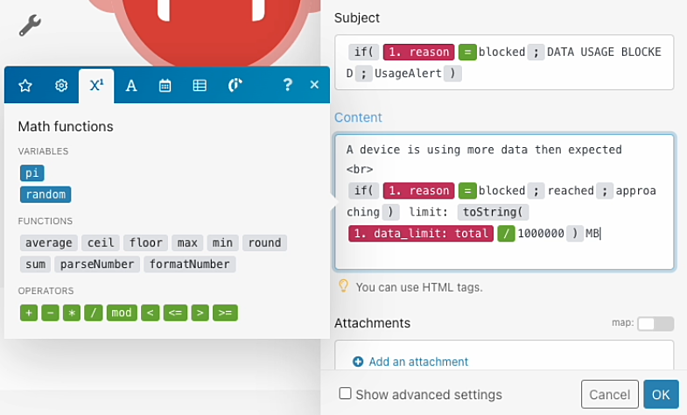
Formatting: depending on the module you are using will depend how you need to format the content. For example, if you are using email it will need to use html tags to change formatting including being able to seperate text between lines (see <br> used in the example)
Testing the notification
Once you have finished configuring your module, save the Scenario and click the "Run once" button one more time. There should be a extra event waiting in queue. This will be the original test's event for when the SIM went over the data limit. Click on "Process existing."
If you have already used it or want to do a fresh test you can click "Listen for new" and run the test again.
If the notification is not received, check the information next to the second module. It shows if it failed and what the response was from the service you are using. For further testing you will need to repeat the SpeedTest on the phone you are using.
Turn On Your Scenario
Once you have gotten the notification set up as you prefer go ahead and save it and turn the Scenario on. Select "immediately", so the scenario runs everytime the event is received instead at specific time intervals.
Once it is online, run the test one more time to make sure that the Scenario is working. Congradulations, you have set up Usage Alerts.
Don't Forget: To change the data limit on the SIM you were used for testing. Also change the Tags in the webhook, so that it fits with your production requirement.