
In this article you will learn how to set up an AWS IoT Core Connector where you use AWS IoT Core to communicate with a device without it knowing anything about it.
AWS IoT Core is AWS' IoT offering. Normally you would have an AWS SDK on your device, and you would need to generate keys and provision each device before it is ready to be used in AWS IoT Core.
By using a connector Onomondo takes care of this. The first time your device comes online it is automatically provisioned, and in your AWS IoT Core you will now be able to see the device, and see that it is online. When the device sends data packets (TCP, UDP, and ICMP) their payload will be sent as events to your AWS IoT Core. All of this is done without having anything installed on your device, and you do not need to generate, or keep any certificates, because all of that is handled by Onomondo.
It's a way to have your devices be as small as can be, but still use the power of the AWS IoT Core.
- Create the AWS IoT Core Connector
- Add the connector to your sim
- Turn on the device, and see state change
- A little nifty setup
- See data going out of the device
- Send data back to the device
- (Optional) More strict policy
1. Create the AWS IoT Core Connector
In the Onomondo app, create a new connector.
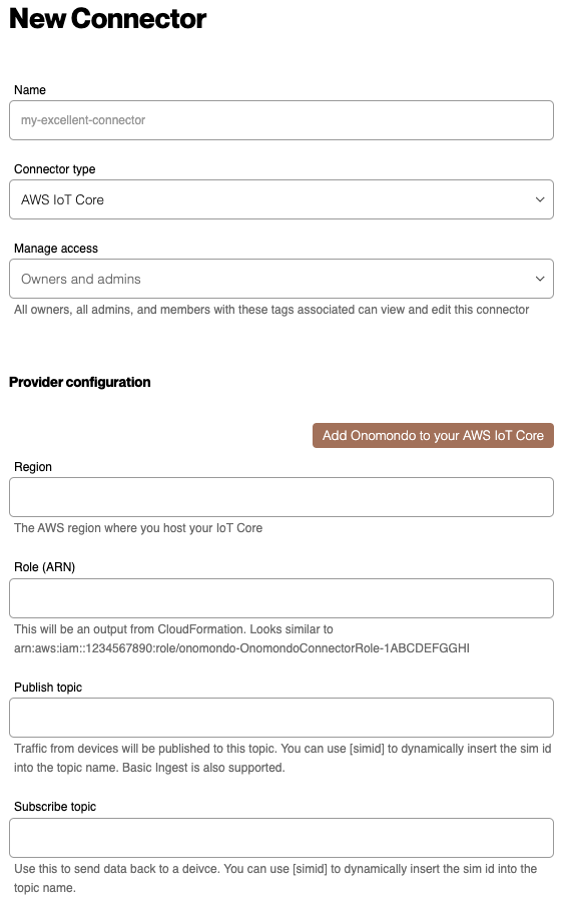
First thing is to click on Add Onomondo to your AWS IoT Core. This will open this window.
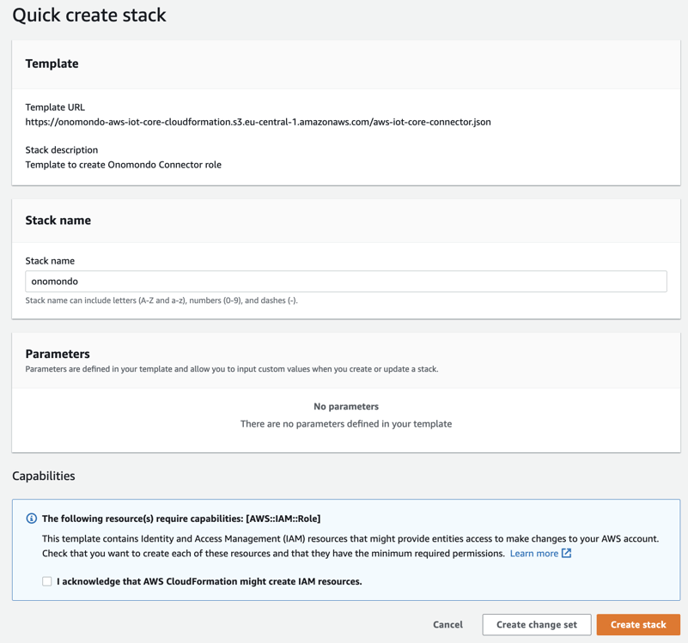

You do not need to change anything, and can just click the checkbox, and Create stack.
Now the stack is being created, and after a minute or two you should be able to see a Role in the Outputs tab.
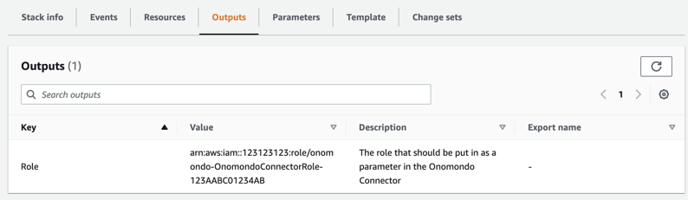
You need to copy that value in your connector settings where it says Role (ARN).
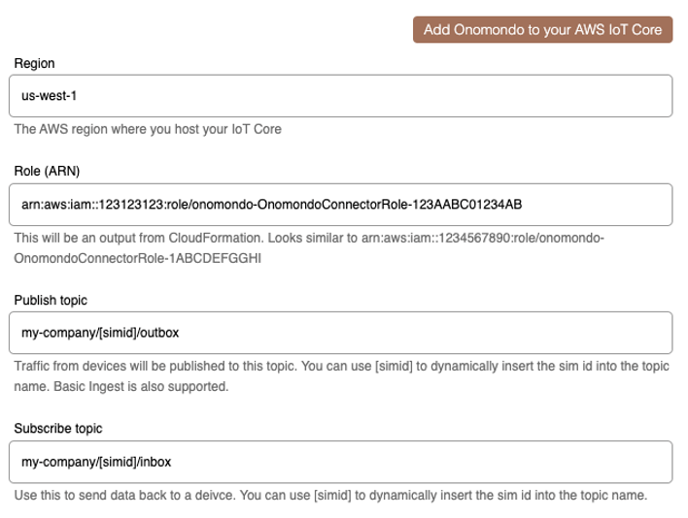
You should also set the region to where you created the stack, and put that in Region.
There are two topics, Public and Subscribe. You can modify them to fit your current setup. You can even use Basic Ingest to save on cost. Payloads sent by your device will use the Publish topic, and if you need to send payloads back to your device you will use the Subscribe topic.
Note that if you write [simid] this will be changed dynamically for each sim connected. If your Publish topic is my-company/[simid]/outbox and sim 123456789 sends a packet, then it will be published to my-company/123456789/outbox.
If you make any mistakes, it's easy to simply delete the setup from AWS and try again. Just go to CloudFormation and remove the onomondo stack.
2. Add the connector to your sim
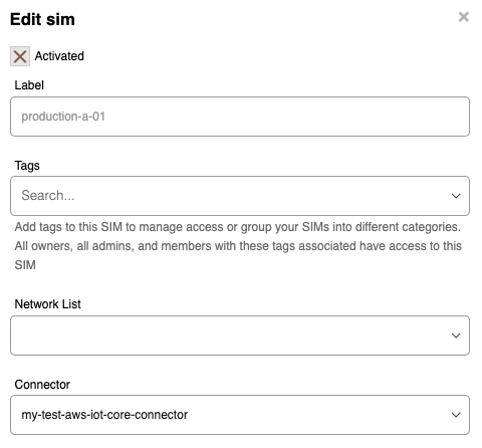
Find the SIM you want to use for this, and edit it. All you need to do is choose my-aws-iot-core-connector in the dropdown.
3. Turn on the device and see state change
Now you are ready. Turn on your device.
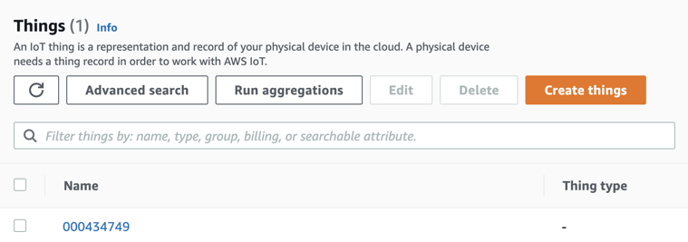
When Onomondo sees the device come online, it will create certificates for the device and provision it. You will be able to see it under Things. The name is the sim id that is used in Onomondo.
If you click on the name and click on Device Shadows you will see that Onomondo has already set some information about the current connection.
4. A little nifty setup
To help see data, we advise you to use the MQTT test client that AWS has. You can find it under the thing.
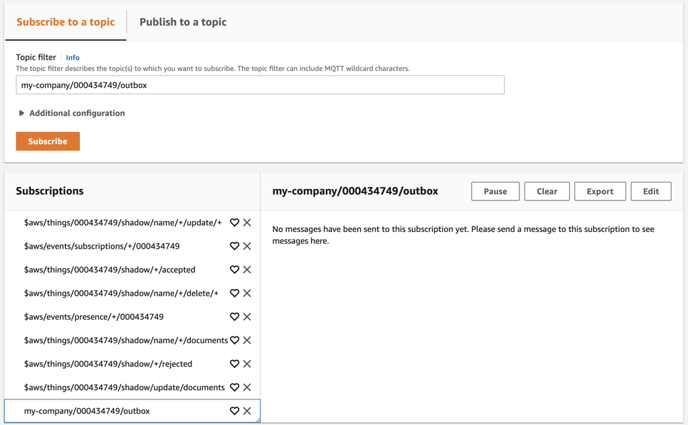
Onomondo will use the Publish and Subscribe topics you have set. In the following examples we use my-company/[simid]/outbox and my-company/[simid]/inbox. You can even subscribe to all events by subscribing to my-company/#.
Subscribe to the outbox, like this:
It is also advices to keep an eye out on the Onomondo app while you set up a new device. Keep Traffic Monitor open, to see any traffic going in or out of your device.

5. See data going out of the device
Any data sent out of the device will be sent to your Publish topic. In this example on my-company/[simid]/outbox.
An important note is that because you are using a connector any data being sent out will be picked up and sent to your AWS IoT Core.
To test here we send a UDP packet to 1.2.3.4:4321
echo hello world | nc 1.2.3.4 4321 -u
In your AWS IoT Core you will be able to see the message.
.png?width=501&height=259&name=aws1%20(1).png)
One thing to notice is the header property. Onomondo will post relevant information about how the payload was sent. Note that the IP address mentioned is a private one and is not accessible on the Internet but is available if you use OpenVPN.
If you look at Traffic Monitor you will be able to see what it looks like from your device's point of view. Notice that it is only one little UDP packet - the device has no knowledge of AWS IoT Core in any way and can remain as small as possible.

6. Send data back to the device
By publishing to your Subscribe topic you are able to send low-level data packets to the device. In this example we use my-company/[simid]/inbox.
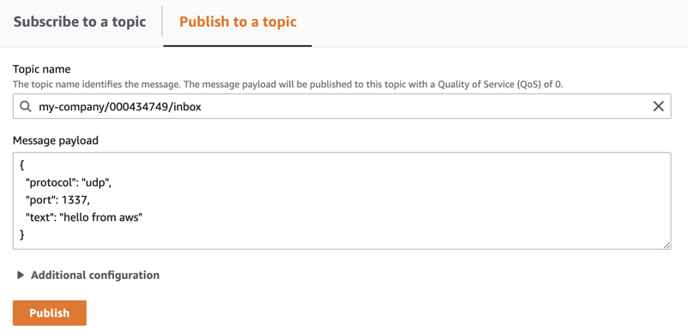
This sends one single UDP packet to the device, on port 1337 with the payload hello world.
If we open Traffic Monitor we can see it here:

Protocols supported are udp and tcp.
If you need to send binary data, then use data instead of text and base64 encode the data you need to send. It is similar to the Message API we also offer.
7. (Optional) More strict policy
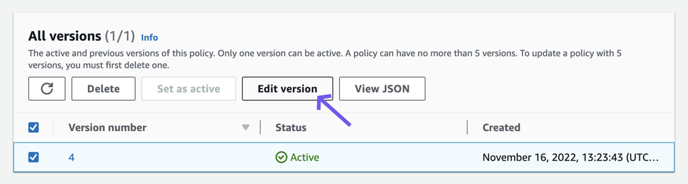
When creating a CloudFormation stack Onomondo’s service account is given access to all IoT Core publish & subscribe events. While Onomondo does not subscribe to anything other than the Subscribe topic, it can be a good idea to still lock down the access even further. This can be set in the AWS Console by going to IoT Core → Security → Policies and selecting “onomondo-thing-policy”.
Then, select latest version and click “Edit Version”
Then, using the AWS’s Policy Builder you need to update the last 2 columns — iot:Publish,iot:Receive and iot:Subscribe.
Here we will let the Onomondo’s service account access only the onomondo/* namespace, but it can include other policy variables, more details can be found here.
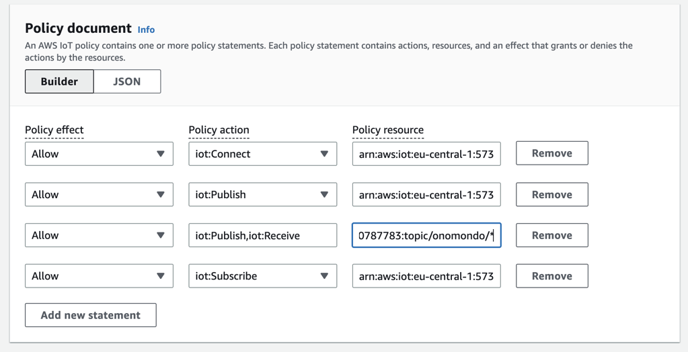
💡 Note: The iot:Publish, iot:Receive, and iot:Subscribe policies have to match the topics you set in your connector’s configuration for publish & subscribe respectively.
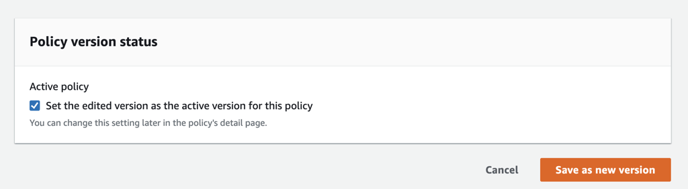
Then, check “Set the edited version as the active version for this policy” and click “Save as new version”
Summary
We looked at how to take a device that does not generate keys, provision, and does not have any AWS SDK's and does not understand TLS, but was still able to communicate with AWS IoT Core by using Onomondo's connectors.
We were able to see when a device came online or went offline, read payloads of the packets sent, and even send data back to the device - all by using AWS IoT Core.