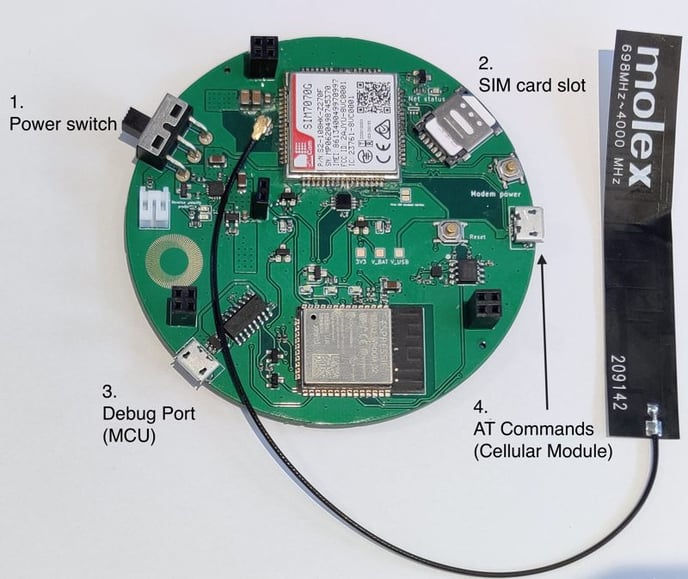
The layout of the board is quite simple and designed for simplicity and aesthetic appeal to achieve a few specific functions
The majority of the device is found on the bottom layer of the device.
There is a power switch that you will need to turn on when you start to use the device.
There is also a charged battery and a SIM card slot, which already has a set up SIM inside.
There are two Micro-USB ports, one that is connected directly to the Microcontroller Unit (MCU) and the other to the Simcom SIM7070G module. Both of these ports allow for charging, however the battery life on these devices allows for 10 hours of connected testing before this would be required.
The board itself was designed to catch the eye, be simple and educate users on device set up for connectivity as well as some of the more unique features offered.
How to use the board
There are four key parts of the board:
- Power switch
- Sim Card
- Debug port (MCU Debug/MCU Upload) / Charging
- AT Commands to SimCom module / Charging
Once you power on the device it will automatically start connecting to the Internet. After 30 seconds of inactivity the device enters sleep mode it goes to sleep. The device can be woken up again by moving or lifting the device.
What does the device do?
When the board is turned on, the SimCom module connects to the internet through LTE-m or falls back to 2G. When it comes online it will start sending packets to the Internet. As soon as it comes online it will open a connection to IP 8.8.8.8 typically used for DNS lookups, which includes the initial handshake and occasional TCP keepalive probes.
While it is connected push down the "touch me" button to measure and send temperature and battery level json-object to 8.8.8.8.
If there is a connector on the device, the data will never reach the DNS server but will be handled by the Onomondo servers instead. If the connector is removed the server will most likely ignore the data as it is not a DNS lookup.
After 30 seconds of inactivity it will enter sleep mode again.
Other uses of the board
The default settings allow you to become familiar with Platform features like Connectors and Traffic Monitor, which you can see using app.onomondo.com/getting-started
This board is also designed to test some of the features of Onomondo's and help with some initial debugging
1. VPN
You can follow the How to set up a basic VPN tunnel on your computer.
Once it is set up and you are connected to VPN, you can ping the device while it online. Once connected, It stays online for 30 seconds giving you time to run the ping command in your computer's terminal using the IP of the SIM that can be found on the SIM page.
Stay on the SIM page, as you will be able to see the results of the ping in Traffic Monitor.
Code example
ping 100.67.251.66 -c 8
IP used is 100.67.251.66, is an example IP and you should use your own SIM's private IP. Adding the "-c 8" will ping 8 times.
Afterwards, you can go have a look at the Traffic Monitor tab on the SIM page you were connecting to and you will see ICMP packets going to and from the connected SIM. These are the pings and device responses.
2. Clearing the FPLMN of other devices
Sometimes, a device will add networks to the forbidden network (FPLMN) list on the SIM. Main time this happens is when the network is not on the network-whitelist.
There are ways to clear the FPLMN list, especially if you can send AT commands to the module.
Otherwise, during initial testing, you can also use the getting-started device. It is quite simple. First you will need to make sure that the device won't re-write the network to the SIM's FPLMN list.
You will need to check:
- The SIM is still activated
- The network you want to connect to is on the network-whitelist
Then use the device:
- Make sure the network you want to connect to is on the network-whitelist
- Take out the current SIM and insert a desired SIM into the getting-started device.
- Turn the getting started device on.
The device may or may not connect to the network with this SIM but during the connection process it will clear the FPLMN list on the SIM. Afterwards take out the SIM again and continue testing.
Warning: The way this device clears the FPLMN list is not optimal in real life scenarios. In these you should follow these guidelines.
3. Changing Connectors
While you do not have to change anything on the device, it is set up to send a JSON object using TCP. This means that you can change the Connector without the device knowing anything or firmware requiring an update. A straight forward example could be setting up a demo HTTPs connector
4. Testing Connectivity using AT commands
There is already a great article on testing connectivity using your getting-started device.
5. Uploading other code
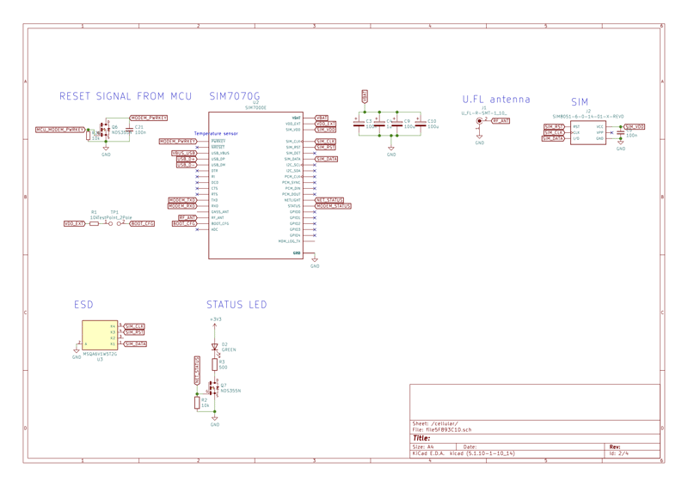
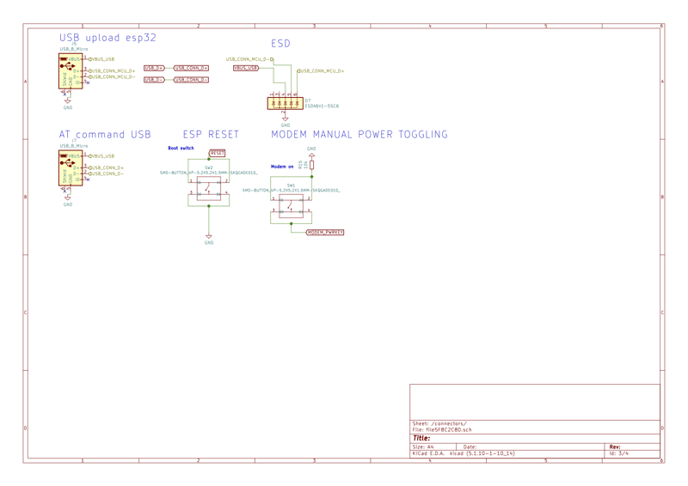
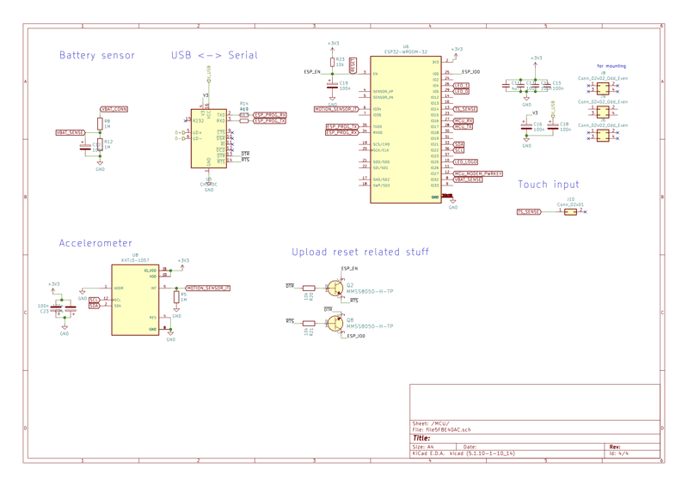
Board Design Schematics